|
bedside awning
introduction
Ever since I have had the camper trailer I have desired a
quick and effective way of stretching the bed side awning without
the use of pegs, poles and ropes. I was inspired when I spied a
trailer in a caravan park doing exactly this on a recent trip away.
Further inspiration came when I found out via the CamperTrailers
forum that you could easily get 1200mm long by 10mm diameter
fibreglass poles from electric fencing suppliers. Gallaghers and
Thunderbird both produce suitable poles:
http://www.gallagher.com.au/permanent.component.aspx?mktprodid=1081
http://www.thunderbird.au.com/gen_faccessory.htm
Each pole cost ~$4. The remainder of bits I had lying about in the
shed, so total cost for this project was $8.
putting
it together
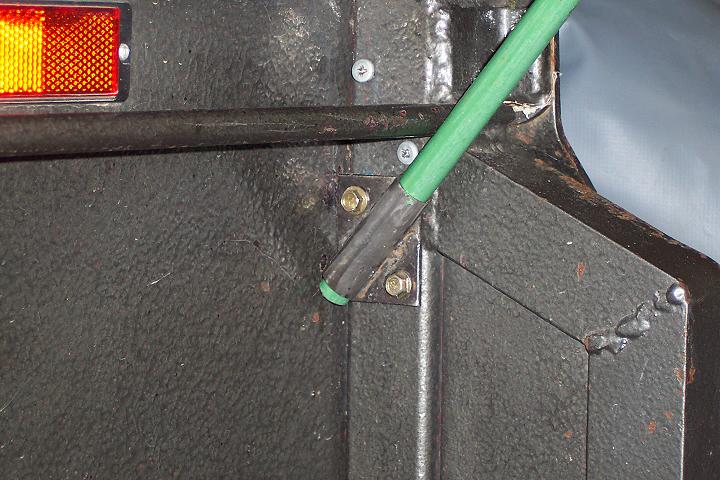
I fabricated a tubular bracket to attach to either end of the
trailer to hold the end of the poles. The tube is welded to a 50mm
length of 40mm x 3mm flat steel at 45deg to the vertical. I used
12mm steel tubing over the end of the fibreglass poles to stiffen
and make the end more robust with ongoing usage. 12mm aluminum
tubing can also be obtained from Bunnings with a 1mm wall thickness
- a perfect fit over the 10mm fibreglass pole.
I found the metal tubing from a broken $10 camp chair was the
perfect size to accept the 12mm diameter tube fitted over the end of
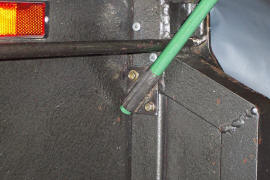
the fibreglass pole. The brackets are Tek screwed to the side of the
trailer. I initially mounted the bracket higher, but found the poles
rubbed against the lower edge of the tent base, so decided to lower
them as shown in the photo.
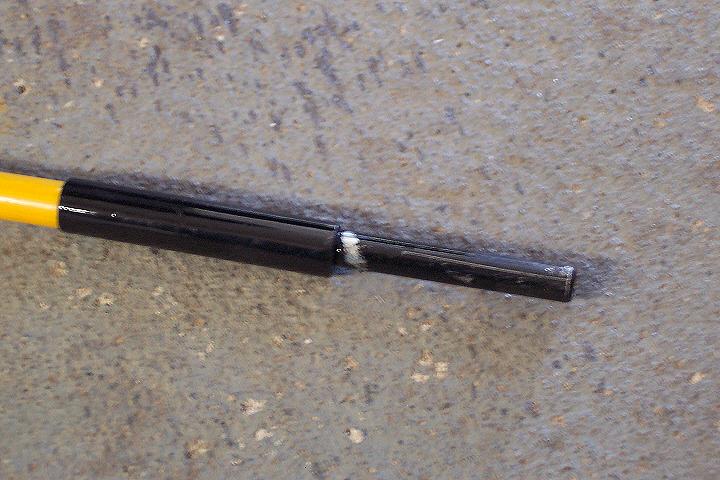
The tip of the pole required a bit more effort to fabricate a
usable tip. If access is available to a metal lathe the process
would be somewhat more precise and simpler. I decided to drill a
10mm hole lengthways down a 60mm length of 12mm solid steel bar.
This hole was only drilled to a depth of 50mm, using a drill press
and vice. The remaining 10mm of bar was drilled and tapped to accept
a 5/16 UNC bolt, which fits inside the eyelet OK. I chopped the head
off the bolt once tightened into the hollowed bar. This was then
pushed onto the other end of the fibreglass pole.
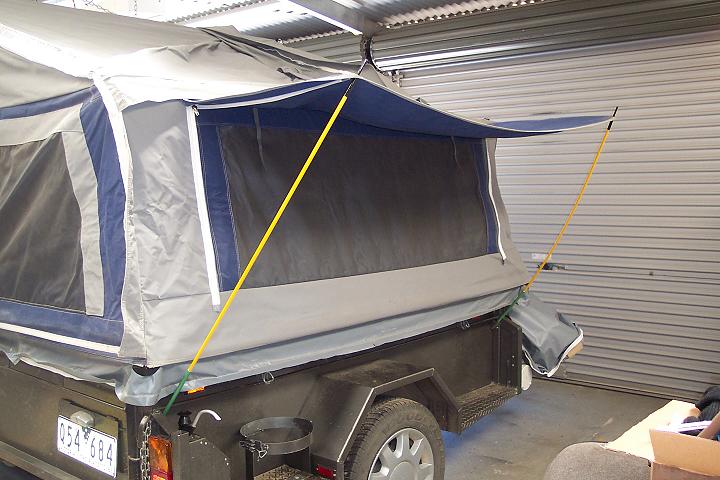
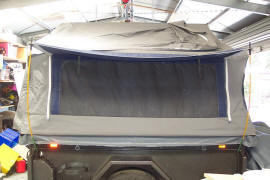
With the brackets in place on the trailer, erection is simply
a case of slipping the fibreglass poles into the trailer's sockets,
then gently bending the poles into the awning holes. The flex in the
poles helps keep the awning reasonably taut without extra ropes.
how it works
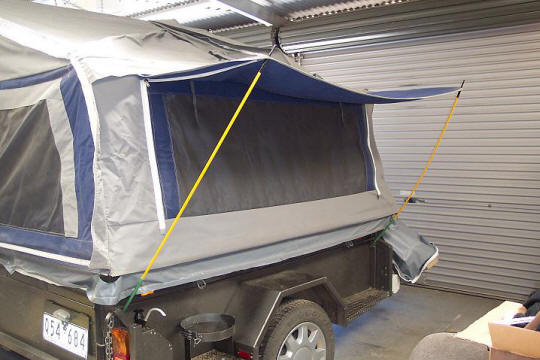
I initially used only short lengths of steel tubing over the
fibreglass poles at the trailer end, but found the tension applied
to the awning somewhat lacking. Increasing the length of this tubing
to around 250mm meant the poles could only begin bending closer to
the tip, and this increased the tension to a more satisfying level,
the pole curvature is more obvious in the side on view below.
To prevent the awning lifting off the pole tips in the wind,
I'm considering pushing some of the rubber cups used underneath
polycarbonate roofing screws over the tip once the awning is in
place
Hope others find may this information useful.
|
|
 |
 |
|
poles in position |
bolt
in end |
metal tubing |
thanks to Ray
Jones for sharing this idea
january 2009
|