|
camper
trailer maintenance

A simple regular maintenance
schedule for your camper trailer will keep it in tip top condition
and no doubt give you an enjoyable trouble free weekend or holiday.
Things are often only thought about when they break and more often
than not in the most inconvenient of places like on the side of the
track in the middle of nowhere.
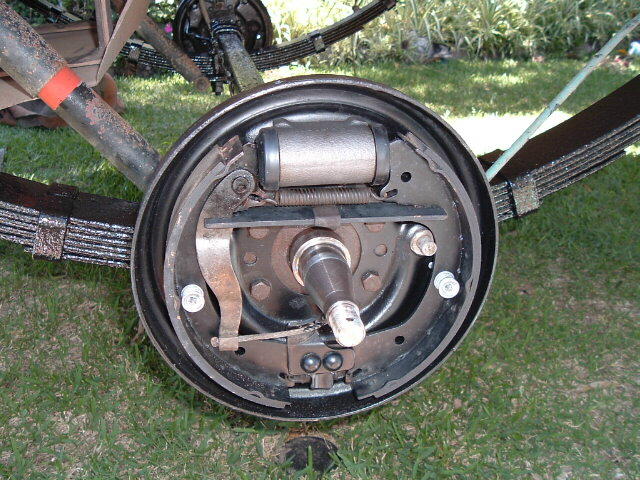
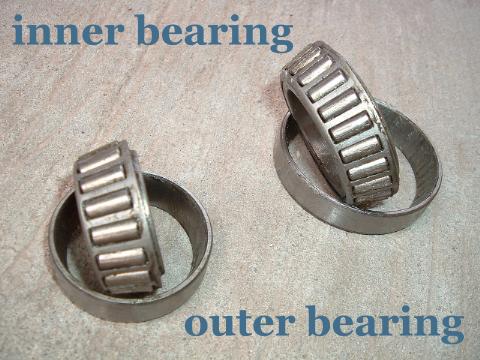
Servicing your own wheel
bearings as part of your trip preparation or part of a regular
maintenance schedule is one job you should feel confident in doing
if you own a camper trailer. This way you know the job has been done
properly and what state the bearings are in. How to breaking down
your trailers hub is knowledge that could be very handy on the side
of the track, not only for you, but perhaps in helping someone else
that is in trouble miles from anywhere.
How often should you inspect
and service your wheel bearings? If you inspect your wheel bearings
and regrease them before a major trip you know what they look like.
Don’t just throw more grease in.
This also gives you a good
opportunity to check the condition of the axle while you have
everything apart. Pay particular attention to the area where the
'step' has been machined to receive the wheel bearings as this is
the most likely place for a fracture to occur. The fracture usually
starts on the bottom so it is not seen until it is too late.
Adjustment of your trailer
brakes will see the camper stopping in an emergency situation as it
should. At times the drums can often be reduced to what resembles a
sheet of corrugated iron all too quickly in our off road conditions
of mud and dust. It is only a simple matter of having the drums
machined smooth. The brake shoes are then rebonded to suit the
machined drums.
Check for leaks and the condition of the hydraulic lines if
you have hydraulic overrider brakes and the tension on the
mechanical handbrake & throw a bit of grease in the grease nipples
of the overrider coupling & check the tension of the bolts.
On electric brakes check the condition of the magnet as well
as the correct adjustment & the handbrake. If you have overrider
brakes hit the grease nipples with a grease gun and check the
tension of the bolts.
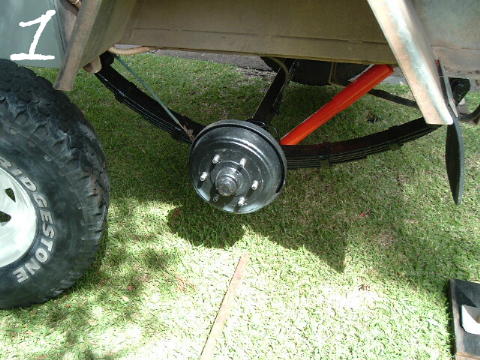
Check the condition of your tyres particularly on the inside
wall where damage can be hidden from view. Uneven tread wear can
show you have a bent axle. Tyre age is also an important factor. A
trailer tyre can be years old and have minimal kilometres, however
tyres do have a life expectancy of around 5 to 6 years owning to
deterioration of the rubber compound. Check for tyre splitting which
will show its age. Make sure the tyre pressures are correct for the
load carried and your spare is also inflated. If the spare is locked
do you have the key on your keyring and a second hidden as backup.
While you are there check the tightness of your wheelnuts.
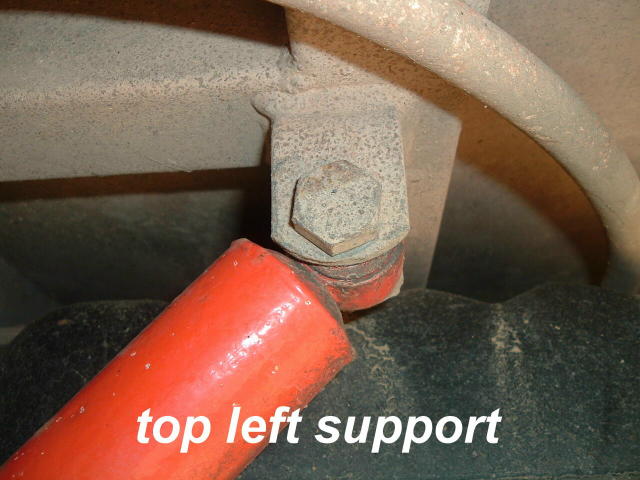
Don’t forget the suspension. Make sure all nuts and bolts are
at correct tension on the leaf or coil suspension as well as the
shocks. Check rubber mounts are in good condition. Look over the
leafs and coils themselves for any sign of wear or cracks that could
let you down.
Underneath the camper can be the most neglected area. Flying
rocks on dirt roads will see the paint on the underside of your
camper severely chipped and quickly removed. Exposed steel gives
rust the perfect opportunity to start and without attention can
become a major job, especially if you enjoy camping on the beach.
You can start by giving the underside a rub over with a wire
brush. There are specific products like ‘rust neutralisers’ on the
market which will stop the rust from further progress. A paint such
as ‘Killrust’ can then be used which will provide excellent
protection. A ‘body deadener’ could be applied to provide a soft
surface for rocks to bounce off. Don’t use a hard setting product
which forms a concrete coating. If this surface is chipped it will
allow moister between the coating and steel providing the perfect
environment for rust to grow.
Inspect the chassis for cracks & look for metal fatigue which
could show up as flaking paint or radiating lines from the stress
point.
It is a good idea also to air the canvas from time to time.
There is nothing worse than to open your camper & find mould growing
on it. Made sure the canvas is well and truly dry before packing it
away. His might take a good day in the sun rather than an hour or
so. Not everyone has the room to fully erect their camper at home.
You can open it best you can and prop the canvas as best you can to
allow good air circulation, throwing the awnings over the fence or
on the clothesline.
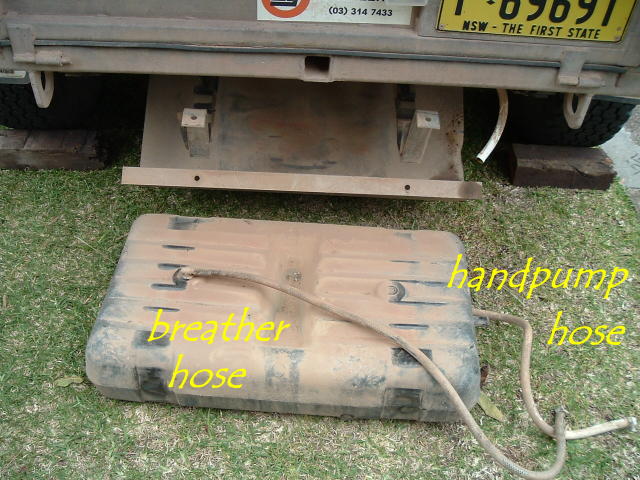
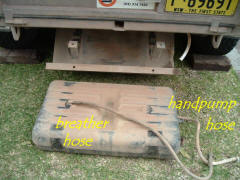
If your watertank has a steel stone shield around it, check
for stones lodged between the poly tank and the shield that could
wear though the tank. Same goes for plastic jerry cans that are not
moved from their holders.
It is a must to keep your drinking water in good condition.
There are two thoughts on whether you should keep you tank full or
empty between trips. If using your camper every few weeks you could
simply top it up, then on the other hand if you are using it once
every couple of months, it may be a better option to drain it.
If you want to clean the tank, do not use bleach as it can
upset your stomach. You can use bi-carb at a cup per 10 litres,
‘Milton’ baby bottle sterilising solution or watertank sterilizing
tables from the camping shop. These can also be used to remove the
plastic taint from the water.
After adding the cleaning solution let it sit for a while and
then the tank must be flushed a few times. To remove all the water
it may be best to remove the inlet hose at the tank & raise the
opposite side wheel.
Gas hoses can become perished, the same as your tyres and
usually become sticky as they start to deteriorate. Check for cracks
& leaks throughout the system with soapy water. Bubbles will show if
there are any leaks.
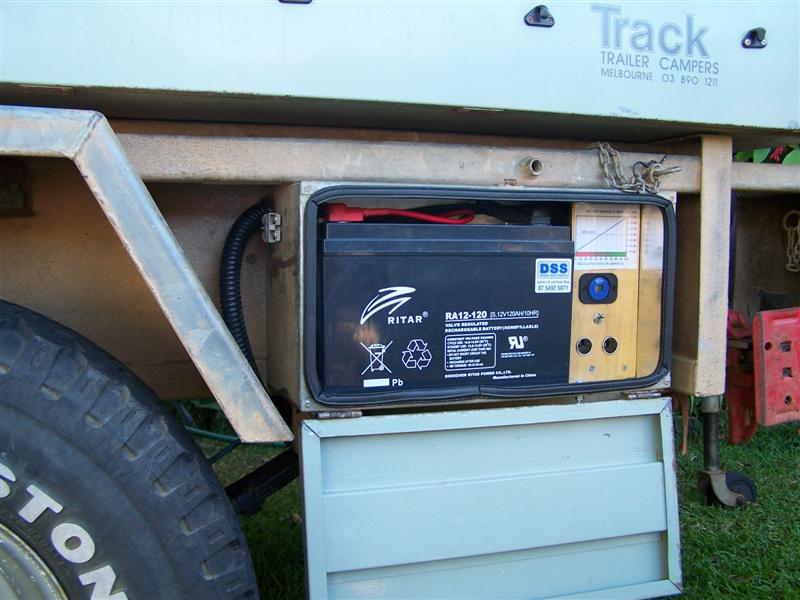
Check the capacity of your onboard battery once a month or
better still leave the battery permanently hooked up to a multi
stage battery charger. This will automatically top the battery up to
full capacity ready for that quick trip at a moments notice.
Follow all 12 volt leads checking for cuts or abrasions as
well as the trailer plug & the Anderson plug if you have the campers
battery hooked up for charging via the vehicle while driving.
|

|
 |
 |
|
axle & bearing inspection |
suspension inspection |
check shocker rubber mounts |
|

|
 |
 |
|
bearing inspection |
battery topped up |
watertank inspection |
more reading
spares
for the camper
http://www.campertrailers.org/camper_spares.htm
axle inspection
http://www.campertrailers.org/axle_inspection.htm
servicing wheel bearings
http://www.campertrailers.org/servicing_wheel_bearings.htm
adjusting camper trailer brakes
http://www.campertrailers.org/adjusting_brakes.htm
replacing that wheel
http://www.campertrailers.org/replacing_that_wheel.htm
by Rob
may 2010
|