|
actuator
length
Measuring the poles extended and retracted – this
may seem self explanatory, but it takes a bit of thinking out. You
need to setup the tent and measure the poles fully extended and
fully retracted to work out the length of actuator you need. I ended
up with 450mm actuator for the front poles, 350mm for the centre and
200mm for the rear poles.
The front and centre poles are direct inline pushes, where the rear
poles are in a 90 degree swinging pole on my camper.
When measuring the extended length it is important to remember that
the tent should not be pulled tight and should have a little slack
in it, not a lot, but the tent needs to sit nice and comfortable and
not pulled tight like a drum.
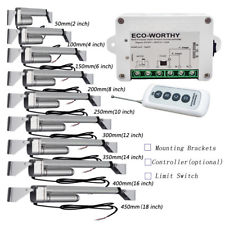
buying
the actuator
I went to ebay and selected a brand that had a
rating of 150kg with a force of 1500 newtons. I found these able to
lift the tent with the awning over the top as well. This brand also
came with a remote control unit you can buy as an option. These
actuators also have built in limit switch that stop the actuator at
both extremes of fully out and fully in, this will be important when
mounting the actuators.
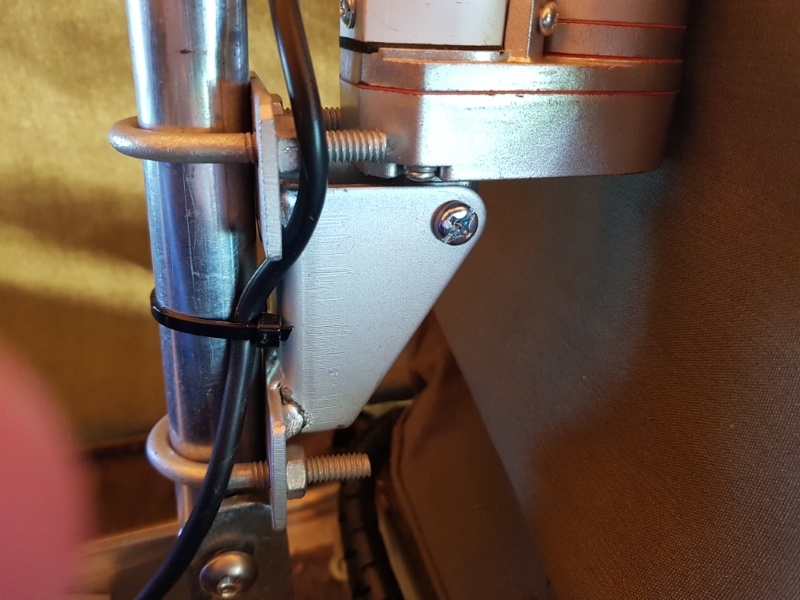
mounting
the actuator
The
actuators came with mounting brackets, however they did not suit
mounting to the tent poles, so I had a friend (who can weld) modify
them so they will mount to the poles using a u-bolt. I found a 8 to
13mm zenith u-bolt that would fit the pole. You will need a lot of
them, twenty to be exact. I found that you can get a discount for
buying in bulk so ask the sales person.
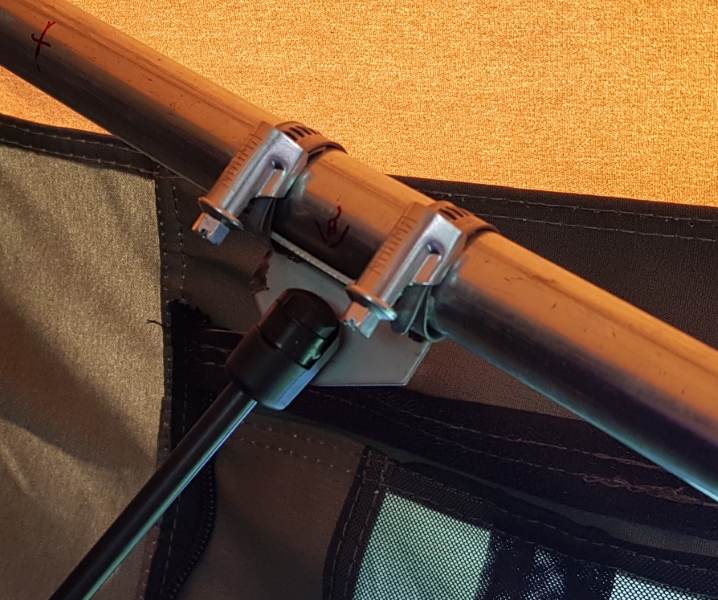
attaching the
actuator
Now that we have the actuators and the brackets
its time to mount them. I will do this frame by frame, so you can
see the differences between their mounting.
Now just a little reminder about the power of these actuators, they
are very powerful and if you let them they will either rip the tent
or bend the poles before they stop, so watch everything until you
have them fitted right. Trust me I found out the hard way and ripped
the stitching in my tent.
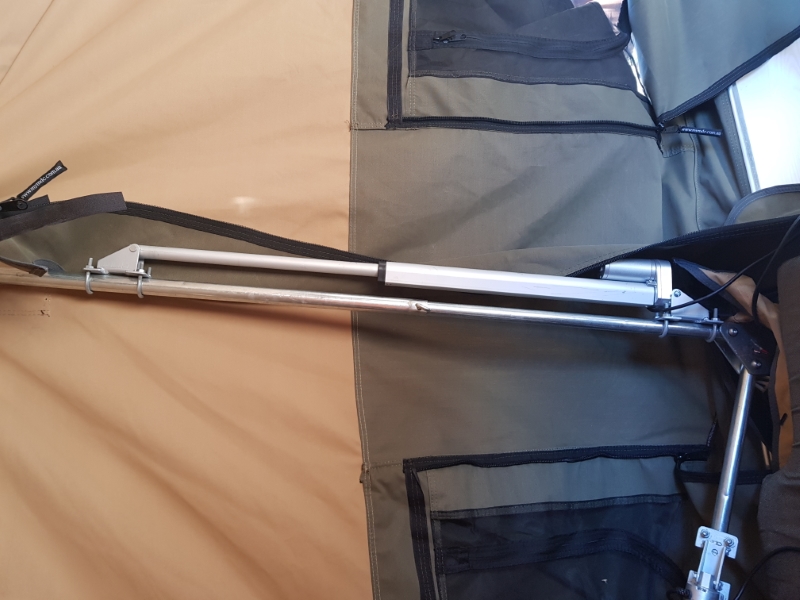
centre frame
This is
the easiest to setup. When mounting the actuator you will need to
have the bottom bracket mounted so the actuator can be fully retract
(on the limit switch) without the frame bottoming out and extended
to full length with the tent is at the right height. This will take
a bit of fiddling but you will find the sweet spot with a little
experimenting.
front
frame
Do the same with this pole as the centre pole
except that you will find the 450mm actuator is a bit short, this is
because I really needed a longer actuator, but could not get one in
the brand I used, this is not a big problem. I found that the 450mm
actuator was able to pull the frame down so it all lay flat and the
camper could be closed up. Yet again make sure the actuator reaches
both limit switches without hitting anything.
I found when the frames were out fully the tent was still sagging
and did not sit right, so I added some gas struts to lift the frame
into place as it pushed out. This will take a bit of getting right
too. I used a 700mm 650 newton strut. The strut does not collapse
and is used as a lever to lift the pole, however if something was to
go wrong and the pole did not lift then the gas strut would act as a
safety and collapse as the actuator extended (remember the actuator
has 1500 newtons force).
The pivot bracket (centre bracket where the frames all mount too) on
the camper will need modifying to allow the centre pole to sit flat
when folding the camper up.
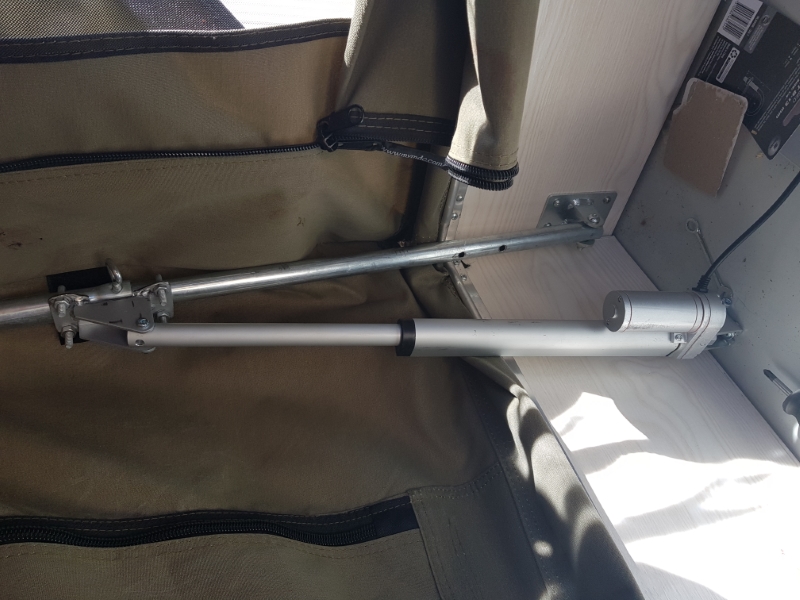
rear
folding frame
By far this was the most challenging to set up.
On the MDC, this frame is a 90 degree folding frame and not an in
line push and pull arrangement like the centre or front frames.
I had to use my CAD program to help me work out the angles and
mounting locations for the actuator as it has to move in an ark from
collapsed to standing upright (a bit tricky for an old fella), but
with a bit of experimenting I got it to work.
The rear poles are suppose to collapse shorter too, however I found
that you can lock it into the right length and it will still fold up
flat. The rear frame is velcro to the top of the canvas &
needs to be detached so the tent can move freely.
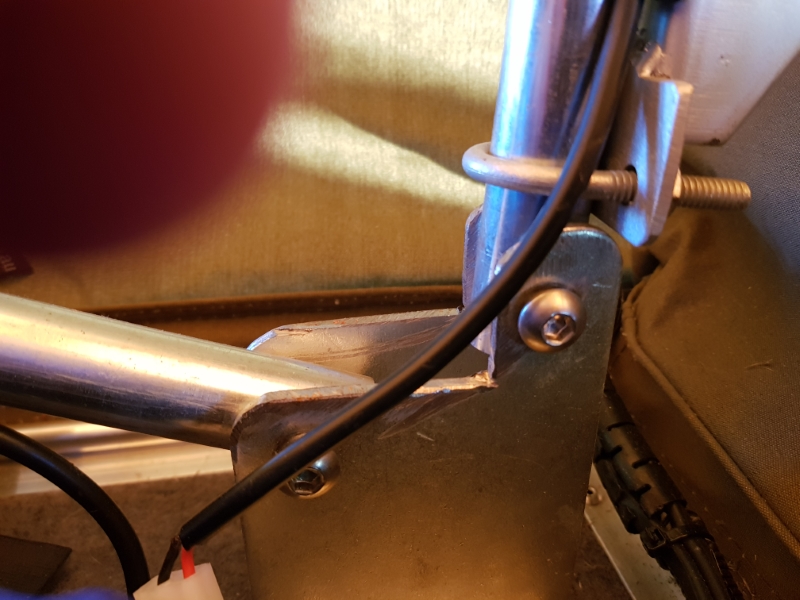
The mounting of the actuator to the floor of the camper was achieved
with the aid of some “nut rivets”. You can use other methods for
mounting but nut rivets are fantastic.
Now this is where I ripped a hole in the stitching of the tent, so
be warmed. I set up the actuator and as it was lowering it ripped
about 200mm of stitching open on the back corner of the tent. This
was because the actuator is mounted about 300mm lower that the tent
canvas and as the actuator came down it stretched the tent until it
ripped a hole.
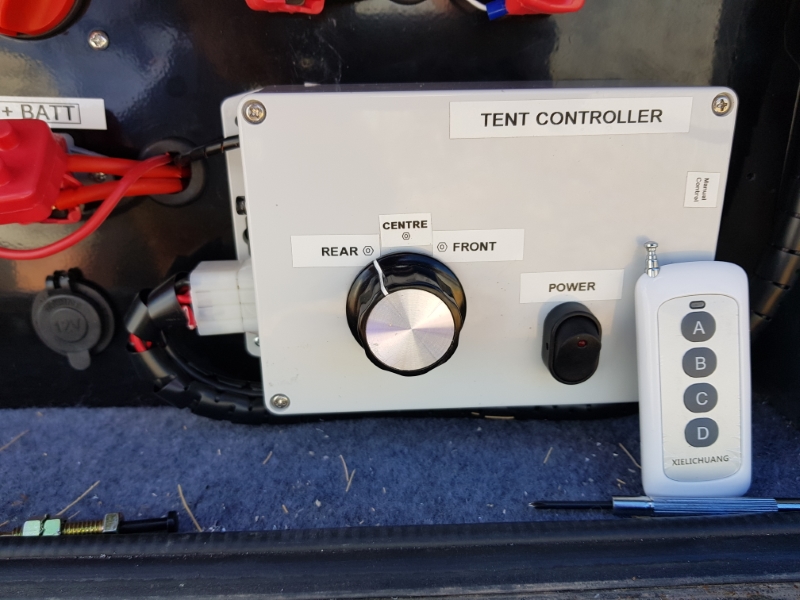
electronics
I mounted all the electrical stuff in a box,
including the radio remote control with a selector switch. When I
tested the actuators I found the current was about 6amp at full load
for two actuators so a full load of 18 amp was too large to have it
all work at the same time, so I used a front, centre and rear
selector switch.
I also fitted a power switch so the controller can be turned off all
together. I intend to change this for a key operated switch, why you
ask, simple really. We are Australians and that makes us all jokers.
We all have the friend that would think it was funny to retract the
tent on you while you were asleep over night, am I right or not.
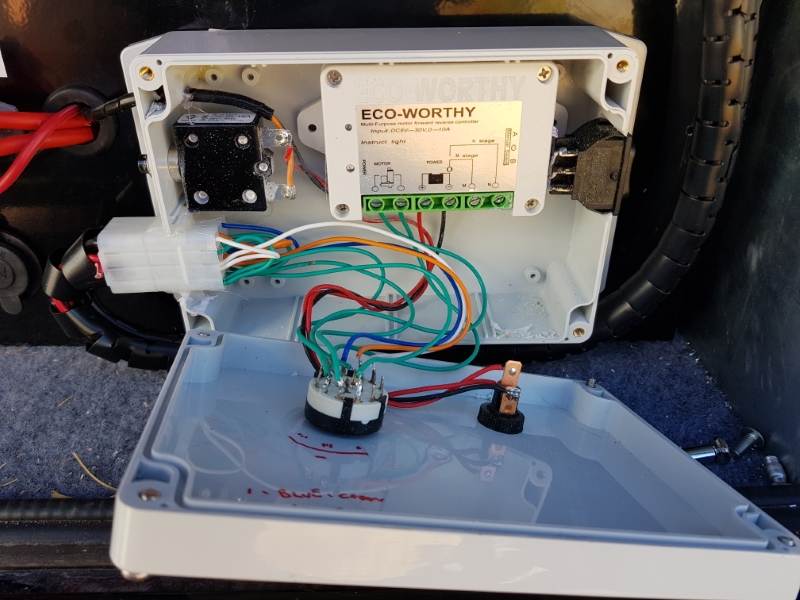
more electronics
I bridged out the internal fuse in the controller and installed an
external circuit breaker. This will void the warranty so get a mate
who is good with electronics so you can blame them when it stops
working (only kidding) but be mindful you wont be able to get
warranty on the controller.
Its best to use a rotary switch or some other switch so you can only
select one frame at a time. The switch will need to be a double pole
so it switches both positive and negative. I also extended the
manual override switch so it can be used externally too.
When wiring up the actuators to the control box, you will have to
think about the best route that wont get in the way of the camper
opening and closing as well as pinch points around the actuator. I
used about 30 metres of twin core cable and wired all the actuators
back to the control box. This is for future modifications like
making it full automatic
Be sure to wire all the actuators the same way so positive is on the
red wire, otherwise you may have one actuator going up while the
other is going down.
For soldering the wires in the control box, I recommend you get or
borrow a good temperature controlled soldering station, it will cost
you a bit more than a standard iron, but you will not regret it.
I located the control box in the power cabinet by removing the
battery charger and putting it in its place. I put an anderson plug
on the charger and use it as a free standing unit. Just plug it into
the trailer anderson plug to charge the battery by mains power. |